Stripe Checkout – Web And Mobile Payment The Easy Way
If you dabble in e-commerce and have yet to try out Stripe, then you are losing out on one of the easiest way to receive payment online. Stripe takes care of the payment process without the need of complex coding. A while back, Stripe released a brand new payment form: Checkout. It has integration with stripe.js and works well both on mobile or desktop browsers.
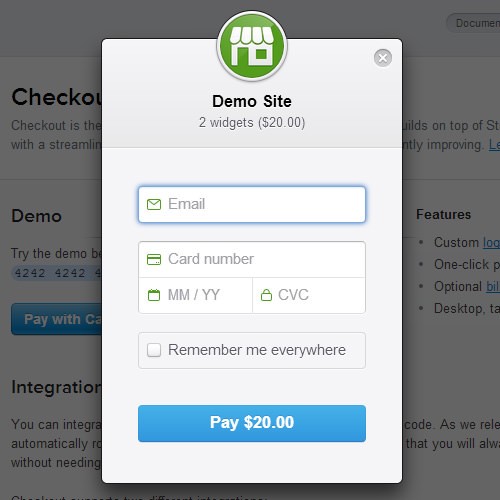
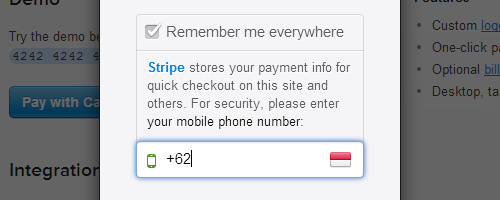
Checkout enables users to easily finish their payment without having to leave the page they are on. Users can also opt to save their credit card data by entering an SMS code sent to their phone. This feature also is embeddable, and Checkout effectively solves problems involving mobile payments.
Recommended Reading: Mobile Payment Systems – The Era Of A Cashless Future
Checkout Overview
The Checkout form is easy to integrate on a site. Just insert this snippet wherever you want the checkout button to appear:
<form action="/charge" method="POST">
  <script
    src="https://checkout.stripe.com/checkout.js" class="stripe-button"
    data-key="pk_test_6pRNASCoBOKtIshFeQd4XMUh"
    data-image="/square-image.jpg"
    data-name="Demo Site"
    data-description="2 widgets ($20.00)"
    data-amount="2000">
  </script>
</form>
In the source, leave it to link from the Checkout server so that the form updates automatically when there are changes. You can change the logo and text by Checkout with your own brand or design. The appropriate data are data-name and data-image.
This default script results in the following button:
To change the button name, simply add data-panel-label to the script and name your button. For more option documentation, please head over to this page.
When the button is clicked, a window will pop up showing forms to complete the payment.
As stated, Checkout gives an optional feature to save the credit card info with SMS code. Users need only fill in their phone number and when you need to make another payment, just enter the code sent.
Customizing The Form
There is also a custom form integration which can be used with any HTML element or JavaScript event. Let’s take a quick look in the following snippet taken from custom integration doc:
<script src="https://checkout.stripe.com/checkout.js"></script>

<button id="customButton">Purchase</button>

<script>
  var handler = StripeCheckout.configure({
    key: 'pk_test_6pRNASCoBOKtIshFeQd4XMUh',
    image: '/square-image.jpg',
    token: function(token, args) {
      // Use the token to create the charge with a server-side script.
      // You can access the token ID with `token.id`
    }
  });

  document.getElementById('customButton').addEventListener('click', function(e) {
    // Open Checkout with further options
    handler.open({
      name: 'Demo Site',
      description: '2 widgets ($20.00)',
      amount: 2000
    });
    e.preventDefault();
  });
</script>
Rather than work with data- attributes like the previous snippet, this custom form uses JavaScript to work with. StripeCheckout.configure() is the handler object when the page loaded. And the option can be passed within the open() or configure().


